Invoice Item Summary
Invoice Item Detail

The Invoice Template screen allows you to configure the printable invoice to be used for invoice generation.
Configuration is completed via Admin > Invoicing > Invoice Template.
The drop down list will show the standard invoice template and any custom invoice that has been created by the IRIS ProjectMinder Development team.
The template selected will be displayed when clicking Printable Invoice in an invoice.
The invoice header section is defined by selecting one of three radio options available.
Use the radio button selection to choose what address for your company to use in the invoice.
Choose between:
This allows for you to use headed paper if you have pre-printed stationary with your company address on it.
This will complete the company address based on the department address assigned to the project in Project > Summary.
Display Department
Name
An optional selection to confirm if you want the department name
included in the address.
This allows you to enter a fixed address below in rows 1 - 8.
If you have selected to Use Invoice Address, complete rows 1-8 with your address details.
If you want to include your company logo in the invoice, use the Invoice Logo upload to locate the image.
Note
Once selected it will display on the screen as confirmation of upload.
Leave this blank if you have pre-printed stationary with your company logo on it.
Tick the Include Invoice Notes check box if you wish to include notes entered against an invoice.
This option allows you to specify how invoice items will be displayed on the invoice.
Select the Invoice Item Summary radio button if you want all invoice items to be summed up and displayed as one line item.
Select the Invoice Item Detail radio button if you want all invoice items to be displayed exactly as they are created and listed in the invoice.
Invoice Item Summary |
Invoice Item Detail |
|
|
These options allow you to specify whether you would like the quantity of invoice items to be included within the invoice.
Tick the Display quantity for time items check box if you want to include time item quantity.
Tick the Display time in hours check box if you want time item quantities displayed in hours. Leaving this un-ticked will display time items in days. This will be calculated by taking the time item quantity (hours) and dividing by the company standard day set in Admin > Company Settings > Working Time.
Tick the Display quantity for expense items check box if you want to include expense item quantity.
Enter your VAT Number if you want this included in your invoice. The Printable Invoice will contain a filter to switch between Invoice, Credit Note, Pro-Forma Invoice. If Pro-Forma Invoice is selected the VAT Number will not be displayed.
Enter any Footer Text you want included in
your invoice. Payment Terms are automatically included in the invoice
template and do not need to be added here.
Below is a table that shows the maximum number of characters/rows that
can used and how it will be viewed/exported.
Please note that the number of characters and number of
rows includes payment terms and VAT Number.
Invoice Footer Output Option |
Maximum Number Of Characters |
Maximum Number Of Rows |
Report Viewer (Browser) |
N/A |
12 |
Print/Print Preview |
N/A |
12 |
Export to PDF |
N/A |
12 |
Export to Word |
255 |
N/A |
Export to Excel |
255 |
N/A |
Export to TIFF |
N/A |
12 |
Click Save when all configuration settings have been applied.
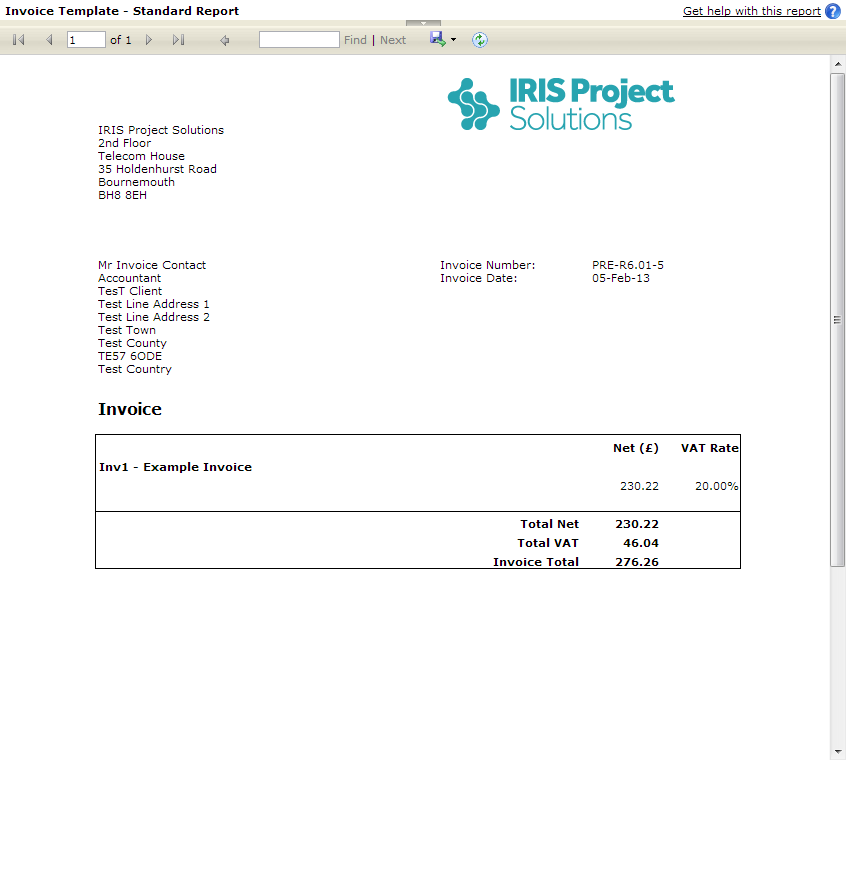
Sample of a Standard Invoice Template

Was this topic useful? Click here to provide feedback.
Need further help? contact support.