Security Groups allow administrators to control what options are available to users after authentication.
Adding users to a security group
Setting security group permissions
You can have as many groups set up as you like, each with different permissions, but a user can only be a member of one Security Group at any one time.
All users within a Security Group share the same permissions to access pages within the system.
For example, you may have an Administrator group that contains users who will have access to the whole system, and perhaps another Security Group called Staff that contains all your other users, who will not have access to, for example, the Administration tab.
![]() Note: Different users within the same Security
Group cannot have different permissions, so if this is a requirement for
you these users should be split into different Security Groups.
Note: Different users within the same Security
Group cannot have different permissions, so if this is a requirement for
you these users should be split into different Security Groups.
For each section there are two security options available per page being Can View and Can Save Changes.
The options are outlined below:
Can View |
Can Save Changes |
Allows all users within the currently-selected Security Group to view the selected page.
They will be able to make visual changes, but will not have permissions to save these changes.
The Save button will not appear if the Security Group does not have Can Save Changes ticked.
If this box is not ticked: - All users within the Security Group will not see the tab for this page at all when they log in. - The user in the group will not be an approver in the User profile page. |
Allows users in the selected Security Group full access to view, edit and save the selected page.
|
To create a new Security Group, enter a name in the 'Add new Security Group:' section.
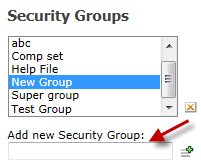
After entering the name, click the ![]() button.
button.
The Security Group has now been created and is ready to add users (see below on how to Add users to a security group).
To add users to a Security Group:
Click on the Security
Group that you would like to add users to in the Security
Groups box.
![]() Note:
When selecting the Security Group, all users allocated to the group
will appear in the Security Group Users
box.
Note:
When selecting the Security Group, all users allocated to the group
will appear in the Security Group Users
box.
Select a user from the Transfer User to this Security Group: drop down list.
Click the ![]() button.
button.
![]() Note: As
users can only be members of one Security
Group at a time, selecting the
add option will remove them from the other group.
Note: As
users can only be members of one Security
Group at a time, selecting the
add option will remove them from the other group.
Once you have assigned your users to a Security Group, you will need to set up their permissions.
There are two types of permissions that you can set – General Security and page-specific security.
![]() Note: Before
changing any of these settings, ensure you have the desired Security Group
selected in the Security Groups list.
Note: Before
changing any of these settings, ensure you have the desired Security Group
selected in the Security Groups list.

Was this topic useful? Click here to provide feedback.
Need further help? contact support.