Expense sheet entry is completed via Expenses > Current Expenses.
At the top of the Expense sheet, there is a section to show the status of the expense sheet and the Approver of the expense sheet.
![]()
The date range for your current expense sheet is displayed at the top of the screen and will be determined by the date range of the expenses entered on this sheet.
The Currency box is displayed at the top of the screen and can be used if the foreign currency feature has been enabled. It allows the currency and exchange rate to be selected as default for the expense sheet and applied to all items on the sheet.
The Calculator is provided to assist with any manual calculations.
To record an expense
item time click on the ![]() icon
to add a row to the expense sheet.
icon
to add a row to the expense sheet.
Enter the project name into the Quick Find field or select from the Project drop down list.
If you prefer to select by project number then click the View Code with Project tick box.
Select the project Task that the expense item relates to from the drop down list.
Select the Expense Type from the drop down list.
If the foreign currency feature has been enabled select the Currency from the drop down list.
Enter the Exchange Rate if appropriate (the rate used to buy the foreign currency).
Enter the Unit Cost of the item.
Enter the Quantity purchased.
The total Gross Cost will be calculated.
Select the Tax Rate (VAT Rate) from the drop down list if applicable – your system may be configured to automatically enter the appropriate tax rate according to the expense type selected, in which case this field will be bypassed.
The total Net Cost will be calculated.
Select the Payment Type from the drop down list – this is how you paid for the expense item for which you are claiming
Add any notes applicable to this item by clicking on the Add Extra Information box
Add further rows
to the expense sheet by entering the number of rows required and clicking
on the ![]() icon.
icon.
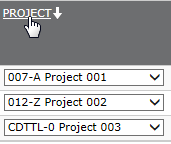
A sort option is available on Project. The sortable options are; order of entry (default) alphabetically ascending, alphabetically descending.
The Totals Summary box at the bottom of the screen details the gross amount for the expense sheet and the reimbursable amount, which is determined by the payment type (items paid for out of personal funds will be reimbursable whereas internal recharges and items paid for from company funds will not).
The Multi Currency Help box gives assistance on entering foreign currency expenses.
Continue adding rows and entering expense items until the expense sheet is complete.
To delete a row
click on the ![]() at the end of the row.
at the end of the row.
Click on Save to save the entries.
You can go back to your expense sheet at any time to add or make changes to the items entered.
When the expense
sheet is complete select either:
- Copy Projects and Tasks to
keep the selected projects on the expense sheet ready for the next
entry or
- Empty Expense Sheet to start the next week with a blank expense
sheet.
The Expense Sheet
can be printed by clicking on the Printable
Expense Sheet link at the top of the screen.
Receipts can then be attached to the sheet and submitted for approval.
To submit the expense sheet electronically click on the Submit for Approval link.
The expense sheet is submitted for approval and the next expense sheet is automatically displayed.
Whilst in draft, expense sheets can be printed from the Current Expenses screen.
Click on Expenses > Current Expenses.
Click on the Printable Expense Sheet link at the top of the screen.
Receipts can then be attached to the sheet and submitted for approval.
Once Submitted, expense sheets can be printed from the Expense History screen:
Click on Expenses > Expense History.
Click on the Start Date of the appropriate expense sheet to open it for viewing.
Click on the Printable Expense Sheet link at the top of the screen.

Was this topic useful? Click here to provide feedback.
Need further help? contact support.